Send Kids the World features kids with life threatening illnesses and injuries and enables you to reach out to them and send them encouraging postcards from all around the world.

We are on a sabbatical leave
|
Post card senders
|
|
Children and Families |
|
|
Our Mission Statement
We would like to reach out to every child and their family who deal with a serious illness. We would like to connect all of them with good-hearted people, who can send them occasional postcards to brighten up their daily lives. Please join us and be part of it!
Postcard Projects |
||
Feedback
We got great feedback from parents, kids and postcard senders. Read more about their comments.
|
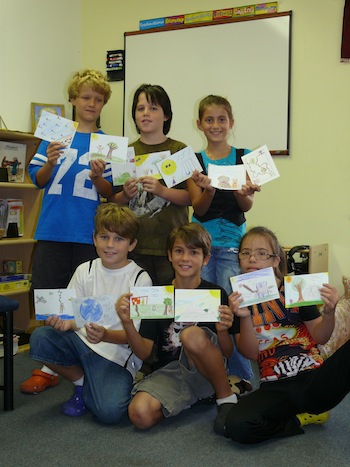
Summit Questa Montessori School made a difference on Make a Difference Day! The entire school created postcards to our children. Check out the best postcards here!
Miami Children's Museum Charter School created postcards on Handwriting Day. It was a bilingual project and the children wrote the postcards in French and translated them in English. Check out the postcards here!
Palm Pointe Educational Research School made a postcard school project for Make a Difference Day.
6a from Middle School Rothenburg Switzerland practiced their English skills by writing postcards to kids on our website.
German Class of Elementary School Rothenburg Switzerland made a bilingual school project. They wrote the created postcards in German and translated them in English.
National Mom-Son-Day 6th grader made an Internship at Send Kids the World. Find out more about the work he accomplished.
Postcard Project at the Y.A.I in New York The Y.A.I, Inc- Astoria Day Habilitation Program in Astoria, Queens, New York sends out postcards to our children on a monthly basis. Read more about their project.
Fellowship of Christian Athletes at Narcoossee School created postcards at one of their meetings.
Family Service Night at the Blake School Read more about their project.
Postcard Project Girl Scout A Girl Scout Group was creating postcards for some girls on our website.
Bat Mitzvah Postcard Project A girl in Florida did a Postcard project for her Bat Mitzvah. Read about it here.
4th grade students from Rothenburg Switzerland wrote postcards in their English class to the children on our website. |
|

Hailey received mail from former President G. W. Bush and former first Lady Laura Bush. Read her letter!